
Apache Airflow is an essential tool for businesses that need reliable, scalable, and automated data workflows. So, while Snowflake is an excellent cloud data warehouse for storing, querying, and transforming data, it does not provide orchestration capabilities. Airflow fills that gap by acting as the control layer that schedules tasks, manages dependencies, and integrates multiple systems into a cohesive pipeline. Snowflake executes the SQL, but Airflow ensures those SQL commands run in the right order, at the right time, and with full visibility and error handling.
Getting Airflow up and running the first time can be challenging. It requires familiarity with Linux environments and command-line tools, especially when deploying in production or integrating with cloud platforms. Setting it up involves configuring environments, establishing a metadata database, connecting to cloud services such as Snowflake, and implementing secure authentication mechanisms, such as JWT. It can feel overwhelming at first, and you will likely have to troubleshoot several different depreciation and compatibility errors on your own.
Still, overall, it is all relatively straightforward once you identify the issues and the benefits make it more than worth any trouble.
To help with this initial setup, I detailed the the exact journey I took to set up Airflow with Snowflake, the challenges I faced, and practical tips to help you avoid common pitfalls.
Building the Foundation: Airflow Environment
Airflow Documentation explicitly states that you should use only Linux- or macOS-based distributions for production execution. However, if you would like to follow along from a Windows computer for demonstration purposes, you can install Windows Subsystem for Linux (WSL) to better understand how Airflow works.
After installing WSL, or from a Linux environment, open Ubuntu from the Start menu and set up your username and password. Then update system packages and install Python/pip
# Update packages
sudo apt update && sudo apt upgrade -y

# Install Python and pip
sudo apt install python3 python3-pip python3-venv -y
Then navigate to your home directory, create and activate Python’s built-in venv module:
# Navigate to home directory
cd ~

# Create a virtual environment
python3 -m venv airflow_env

# Activate the environment
source ~/airflow_env/bin/activate
Now, from within the active environment, install airflow
pip install "apache-airflow==2.9.3" \
  --constraint https://raw.githubusercontent.com/apache/airflow/constraints-2.9.3/constraints-3.10.txt
By using this command instead of simply running pip install apache-airflow, you ensure that Airflow and all its dependencies are installed in versions that have been tested to work together. The constraints file prevents issues caused by automatic upgrades of libraries that Airflow depends on, such as httpx. This approach is critical for maintaining a stable environment:
PostgreSQL Setup
By default, Airflow uses SQLite for its metadata database, but it struggles with concurrent writes, and both the scheduler and the web server need database access. PostgreSQL is far more reliable in multi-threaded environments.
All the commands we go through must be executed from the home directory within your virtual environment, unless otherwise stated. When we create the DAG later, that has to be in a particular folder.
CREATE DATABASE airflow;
CREATE USER airflow_user WITH PASSWORD 'mypassword';
GRANT ALL PRIVILEGES ON DATABASE airflow TO airflow_user;
Then update the connection string in environment variables by editing the airflow.cfg and then saving it to change the default SQLite3 connection to Postgres
AIRFLOW__DATABASE__SQL_ALCHEMY_CONN=postgresql+psycopg2://airflow_user:mypassword@localhost/airflowBringing Airflow to Life: Webserver and Scheduler
With the backend ready, you can just initialize the database.
airflow db initThen launch the Airflow webserver and scheduler:
airflow webserver --port 8080
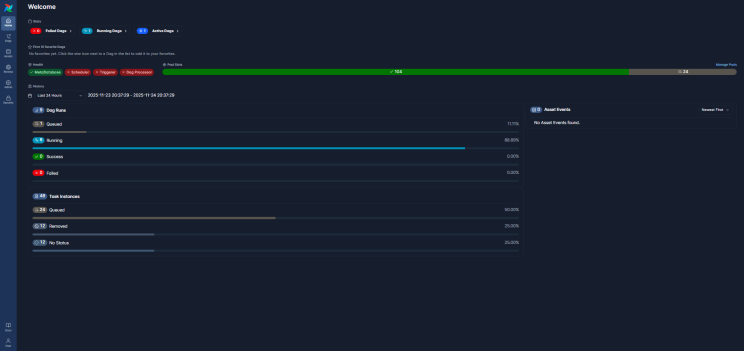
airflow schedulerOnce these are launched, you can access the airflow UI from your browser via Localhost:8080.
Secure Snowflake Integration with JWT
Now that Airflow is up and running, we need to securely connect it to the source system from which we are pulling data. In this case, I’m using Snowflake as a cloud data warehouse. Instead of relying on passwords, I implemented JWT authentication using RSA keys. This approach improves security and aligns with best practices for enterprise-grade data pipelines.
The process started with generating an RSA key pair inside my WSL Ubuntu environment:
openssl genrsa -out rsa_key.pem 2048
openssl pkcs8 -topk8 -inform PEM -outform PEM -in rsa_key.pem -out rsa_key.p8 -nocrypt
openssl rsa -in rsa_key.pem -pubout -out rsa_key.pub
The private key was converted to PKCS#8 format, which Snowflake requires for JWT authentication.
Next, you need to register the public key with my Snowflake user account by running an ALTER USER command in an SQL worksheet in the Retail_Analytics_DB environment I previously set up in Snowflake.
ALTER USER <USERNAME> SET RSA_PUBLIC_KEY=<'Private_Key........'>;This ensures Snowflake can validate the JWT tokens generated by Airflow using the private key.
Finally, you need to configure the Snowflake connection (or the data source you are using) using the Airflow CLI instead of the UI. This replaces the existing connection and adds the JWT configuration.
airflow connections add 'snowflake_default' --conn-type 'snowflake' --conn-login 'RaghavSingh4161' --conn-schema 'PUBLIC' --conn-extra '{"warehouse":"COMPUTE_WH","database":"RETAIL_ANALYTICS_DB","private_key_file":"/home/raghav/airflow/rsa_key.p8"}'You can also edit connections in the Airflow UI. Go to Admin -> Connections and click on the edit button to the right of your DAG. After you enter the basic information, open the additional fields section and fill in the JSON with the path to your private key file.
Writing Your First DAG
A Directed Acyclic Graph (DAG) in Apache Airflow is simply a Python blueprint that tells Airflow which tasks to run, in what order, and on what schedule, without ever looping back on itself. Each task represents a unit of work (such as running a SQL query or a Python script), and the edges between tasks define dependencies.
The term “acyclic” means there are no loops—tasks flow in one direction only, ensuring a clear start and end. DAGs help replace manual, error-prone steps with automated pipelines that run on a clock, retry on transient failures, and surface clear logs when something breaks.
In practice, you place a .py file in the Airflow DAGs folder, define your workflow with tasks and dependencies, point tasks to external systems such as Snowflake, and let the scheduler orchestrate the run. Think of it as the blueprint for your data pipeline. While the logic is expressed in Python, the tasks themselves often execute SQL or other commands. Each DAG specifies dependencies, schedules, and operators that tell Airflow how to interact with external systems, such as Snowflake.
By default, $AIRFLOW_HOME is ~/airflow, so your DAGs folder will be:
~/airflow/dagsInside the dags folder, create a Python file for your DAG. For this example I used Nano to create and edit the file snowflake_etl_demo.py which I created for this demonstration.
nano snowflake_etl_demo.pyThe DAG below builds a simple star schema, where dimension tables (customer, date, store) provide descriptive attributes, and the fact table (sales) stores transactional data. Star schemas make queries faster and analytics easier by organizing data into a structure optimized for reporting and BI tools. Originally, I tried using SnowflakeOperator, but found out that it has been deprecated.
# Import required modules
from airflow import DAG
from airflow.providers.snowflake.operators.snowflake import SnowflakeSqlApiOperator
from datetime import datetime

# Default arguments for the DAG
default_args = {
    'owner': 'raghav',            # Owner of the DAG
    'depends_on_past': False,     # Do not wait for previous runs
    'retries': 1                  # Retry once if a task fails
}

# Define the DAG
with DAG(
    dag_id='snowflake_etl_demo',          # Unique identifier for the DAG
    default_args=default_args,
    start_date=datetime(2025, 11, 19),    # Start date for scheduling
    schedule='@daily',                    # Run daily
    catchup=False                         # Do not backfill past runs
) as dag:

    # Task 1: Create DIM_CUSTOMER table in Snowflake
    create_dim_customer = SnowflakeSqlApiOperator(
        task_id='create_dim_customer',                # Task name
        snowflake_conn_id='snowflake_default',        # Connection ID configured in Airflow
        sql="""
        CREATE OR REPLACE TABLE RETAIL_ANALYTICS_DB.PUBLIC.DIM_CUSTOMER AS
        SELECT DISTINCT CUSTOMER_ID, GENDER, AGE
        FROM RETAIL_ANALYTICS_DB.PUBLIC.RETAIL_SALES;
        """                                           # SQL query to create dimension table
    )

    # Task 2: Create DIM_DATE table in Snowflake
    create_dim_date = SnowflakeSqlApiOperator(
        task_id='create_dim_date',
        snowflake_conn_id='snowflake_default',
        sql="""
        CREATE OR REPLACE TABLE RETAIL_ANALYTICS_DB.PUBLIC.DIM_DATE AS
        SELECT DISTINCT DATE AS SALES_DATE
        FROM RETAIL_ANALYTICS_DB.PUBLIC.RETAIL_SALES;
        """
    )

    # Task 3: Create DIM_STORE table in Snowflake
    create_dim_store = SnowflakeSqlApiOperator(
        task_id='create_dim_store',
        snowflake_conn_id='snowflake_default',
        sql="""
        CREATE OR REPLACE TABLE RETAIL_ANALYTICS_DB.PUBLIC.DIM_STORE AS
        SELECT DISTINCT CITY, STATE, REGION
        FROM RETAIL_ANALYTICS_DB.PUBLIC.SUPERSTORE_SALES;
        """
    )

    # Task 4: Create FACT_SALES table in Snowflake
    create_fact_sales = SnowflakeSqlApiOperator(
        task_id='create_fact_sales',
        snowflake_conn_id='snowflake_default',
        sql="""
        CREATE OR REPLACE TABLE RETAIL_ANALYTICS_DB.PUBLIC.FACT_SALES AS
        SELECT
            r.TRANSACTION_ID,
            r.DATE,
            r.CUSTOMER_ID,
            r.PRODUCT_CATEGORY,
            r.QUANTITY,
            r.TOTAL_AMOUNT
        FROM RETAIL_ANALYTICS_DB.PUBLIC.RETAIL_SALES r;
        """
    )

    # Define task dependencies: Dimensions first, then Fact table
    [create_dim_customer, create_dim_date, create_dim_store] >> create_fact_sales
After you have written the DAG use cntrl+O to save and then cntrl+X to exit.
Run the Airflow Webserver and Scheduler
Now you are ready to restart the scheduler (the scheduler has to be restarted to run the new contents of a DAG file).
pkill -f "airflow webserver"
airflow scheduler
Once running, you can use the Airflow UI to manually trigger your DAG by clicking the play button next to your DAG name. This will execute the workflow immediately, regardless of its schedule. You can also view task status, logs, and dependencies in the UI.
If the DAG does not appear in the UI or you prefer the command line, you can trigger it from the CLI using:
airflow dags trigger <DAG>If your DAG fails or doesn’t appear in the UI, logs are the best way to troubleshoot. You can find detailed logs in the Airflow UI by clicking on the DAG, selecting the specific task, and opening the “Log” tab. Alternatively, you can check logs from the command line by navigating to:
cd $AIRFLOW_HOME/logs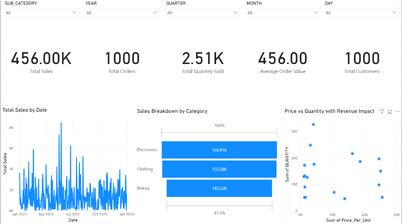
Conclusion
Apache Airflow is a powerful orchestration platform that transforms how businesses manage data workflows. By enabling automation, scalability, and transparency, Airflow ensures that data pipelines run reliably and on time, which is critical for analytics and decision-making. It can augment cloud data storage platforms such as Snowflake, which currently doesn’t support native automation.
The initial setup has many moving parts. You’ll likely encounter dependency conflicts, version mismatches, and database limitations along the way. But these challenges are temporary and solvable through systematic troubleshooting and best practices, such as using official constraint files, isolating environments, and switching to robust backends like PostgreSQL.
Once configured, the payoff is a flexible, enterprise-grade solution that can orchestrate complex ETL pipelines, manage cross-system dependencies, and scale effortlessly as your data needs grow. With proper planning and attention to detail, Airflow becomes the backbone of a modern data infrastructure, delivering reliability, security, and efficiency.